Use Dropbox and Javascript for Better Videos in Weblfow
Are you working on a project and the native Webflow background video element isn't enough for you? Perhaps your client wants a full screen video and Webflow compression makes it grainy and ugly. Or it’s possible that it's an explainer video and sound is VERY important to the user experience.
The Webflow element is extremely limiting for the following reasons:
- Maximum file size of 30 MB
- No audio allowed
- Restricted to the Webflow video player which has only play/pause on click functionality
With a little bit of knowledge of online file management and some custom HTML and Javascript, we can get around these restrictions to make websites with beautiful videos. This blog post will focus on completing three tasks:
- Host video externally on Dropbox - We'll need a direct download link for that!
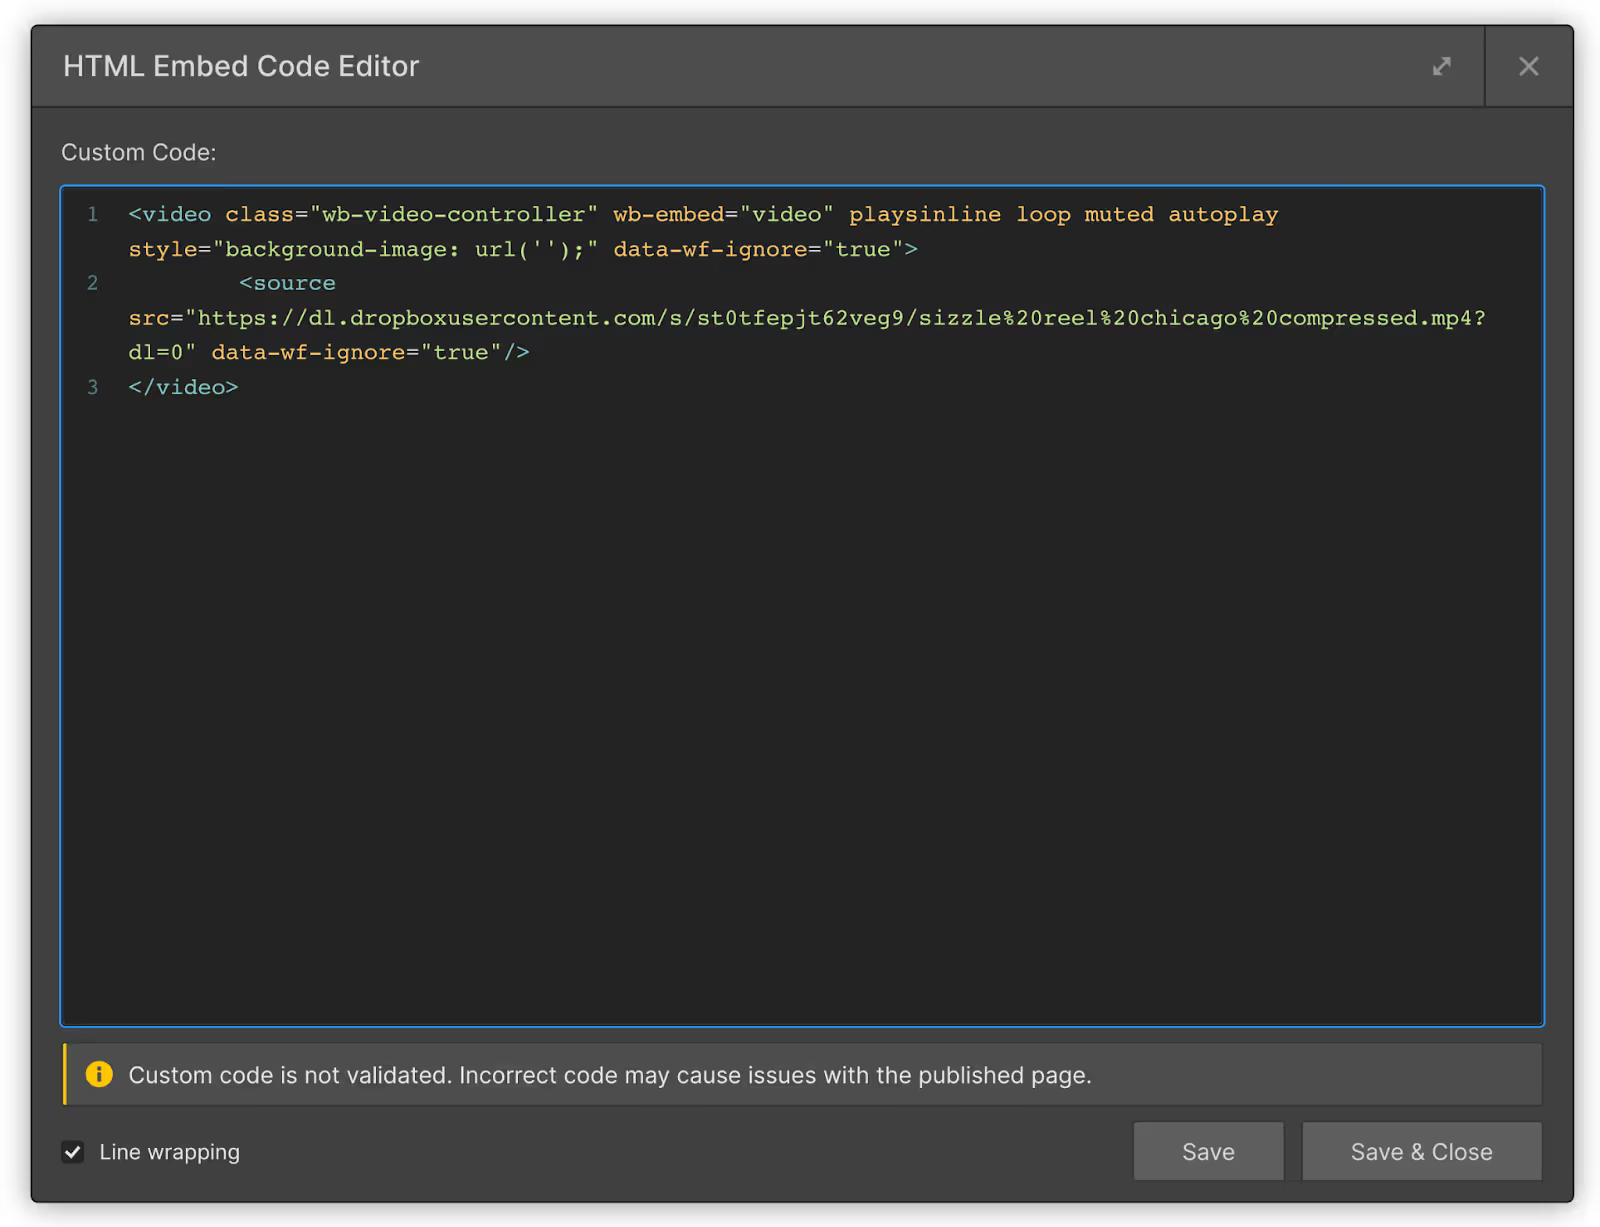
- Use the HTML <video> tag inside an Webflow embed to drop out code into our project.
- Write some Javascript to control video playback
** I will be pulling most of the code and instructions for this from my FREE resource library - be sure to get yourself a copy.
Hosting Video on Dropbox.
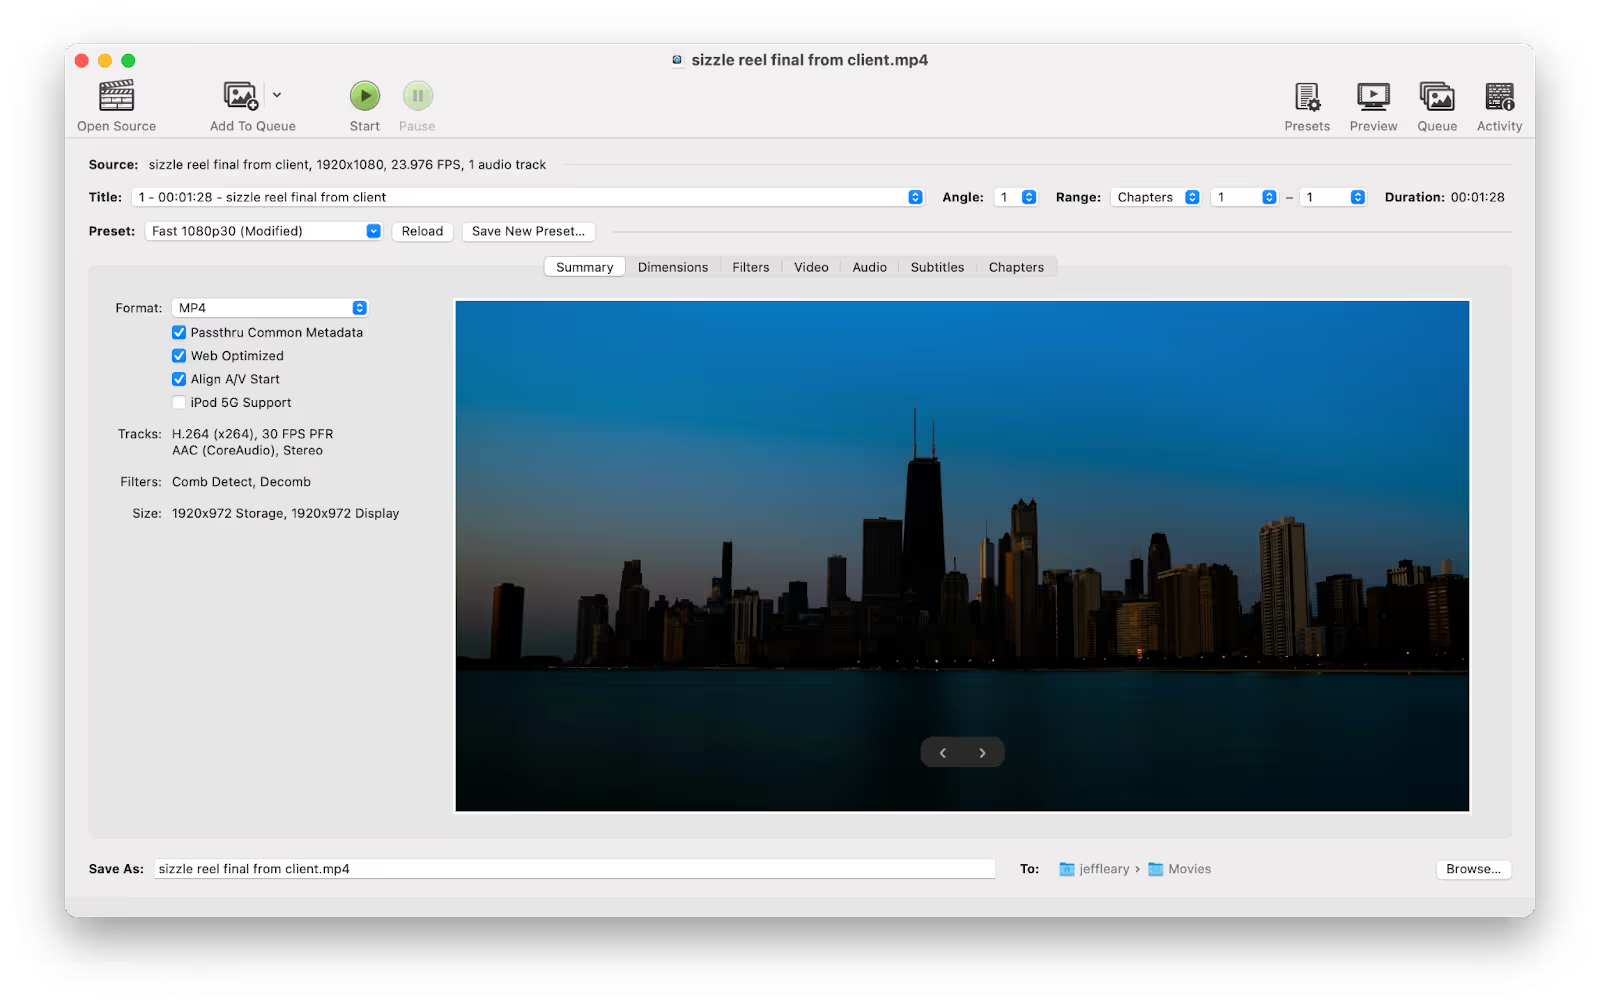
- Compress your video file to 1080p 30fps with the Optimize for web box ticked. I like a program called Handbrake and was able to reduce a 220MB 1:30 length video to 76MB!

- Log in to or create an account with Dropbox
- Upload your video file and create a share link. It will look like this: https://www.dropbox.com/s/40d9bx2w61bn/sizzle%20reel%20chicago%20compressed.m4v?dl=0
- Change the www.dropbox.com part to dl.dropboxusercontent.com.
- It will now look like this: https://dl.dropboxusercontent.com/s/40d9bx2w61bn/sizzle%20reel%20chicago%20compressed.m4v?dl=0
Add The Video Into Webflow with the <video> HTML Tag and Style it to Your Liking
Add the following code to an embed on your page:

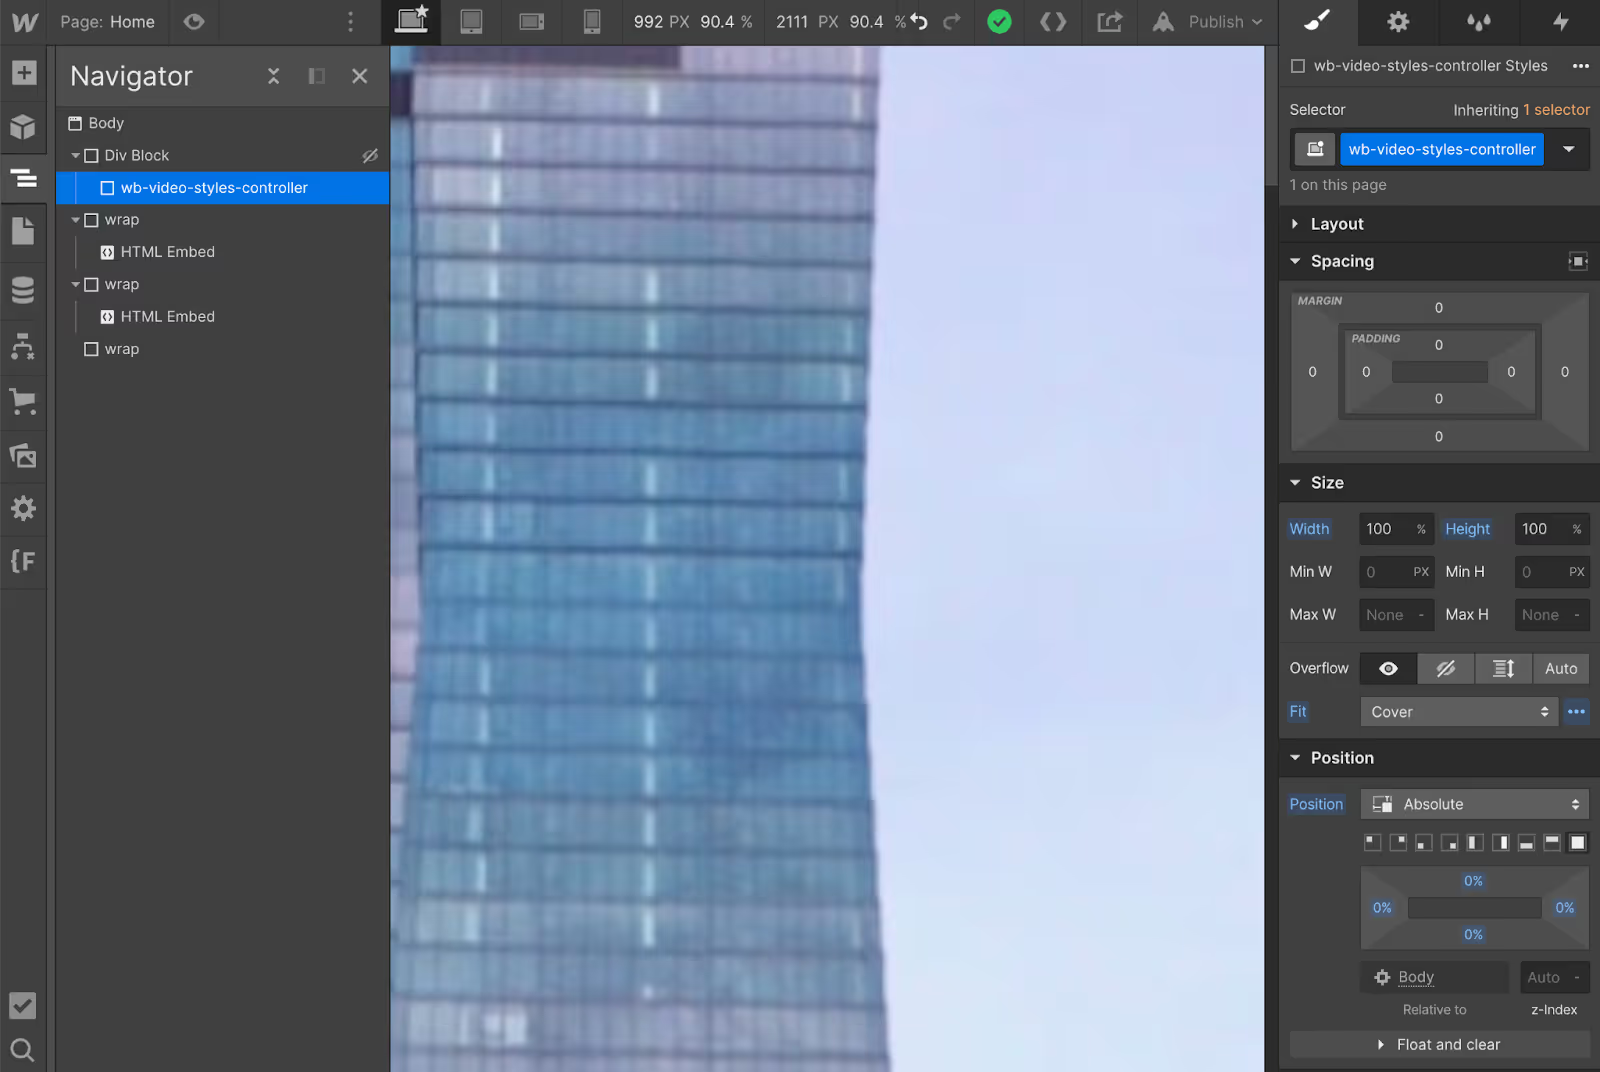
- Add a div block and give it a class wb-video-styles-controller
- Wrap it in another div and hide that div so that wb-video-styles-controller doesn’t interfere with any click events. Or give it pointer-events: "none" with some custom CSS.
- Use this class to style your video element.
- I like the below settings for a nice full screen video (nest it inside a div with height=100vh)

Control Video and Audio on Click
Make sure this data attribute is on your <video> tag wb-embed="video" (If you copy/pasted from my HTML snippet you should be good to go.)
Play/Pause Video only when video is in viewport
We will use the Intersection Observer API to determine when the video element is in the viewport and play/pause it accordingly. You can adjust the threshold value between 0 and 1 to control how much of the video must be visible to trigger the action.
